Replacing Mexican Feather Grass

Recently, a gardener asked what kind of ornamental grass would be good to replace her Mexican feather grass. She had just found out that it was on the California invasive species list and was alarmed that it was freely reseeding in her neighbors yard.

Mexican feather grass – Nassella tenuissima or Stipa tenuissima,  is a beautiful ornamental grass that is easy to grow. As a landscape grass, it has a fine movement in the gentlest breezes. But, it reseeds easily and abundantly, sprouting out of every crack in driveways, sidewalks and paths. For such an angelic wispy form, it is a true botanical thug in the garden!

Mexican Feather Grass
Mexican Feather Grass exhibits its tenacious side – this has sprouted from seed blown down the street a block away!

Why do the garden centers still sell this plant? Because it is popular and there are no laws to stop them. Mexican Feather grass is native to the south-western United States, northern Mexico and Argentina.

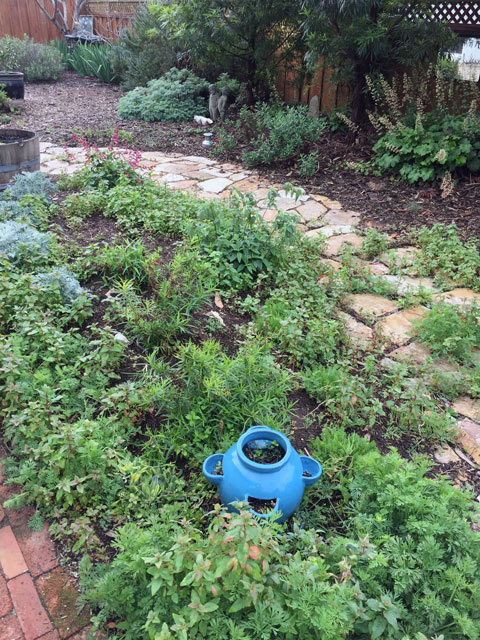
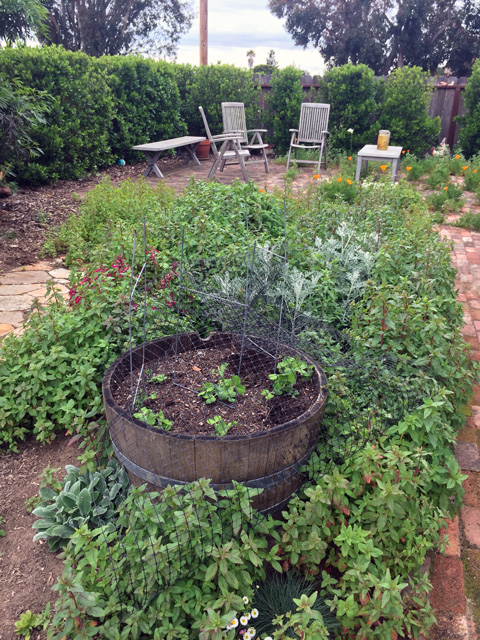
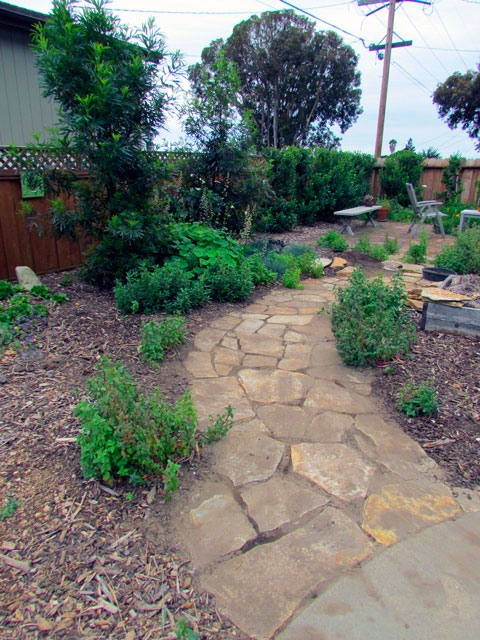
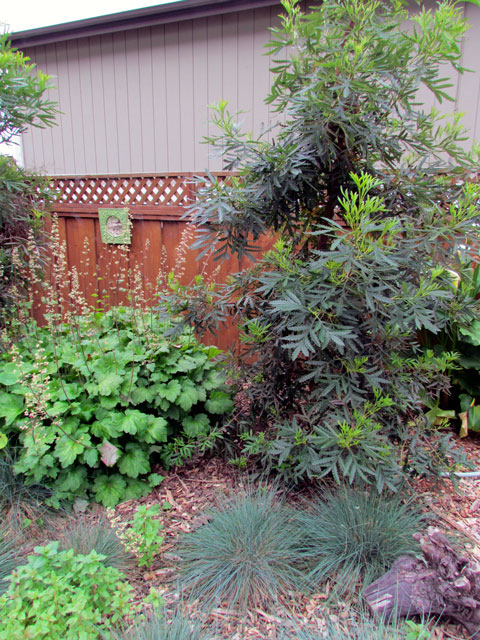
For this gardener, it was important that the replacement grasses have the same easy care and drought tolerance, and, have movement and upright form. We came up with this list that best suited the criteria and growing conditions of her garden as well as being non-invasive. As an added bonus several of these selections provide deep roots to stabilize slopes, create seeds for birds and food for insects.

‘Karl Foerster’ is tall and stately in a planting

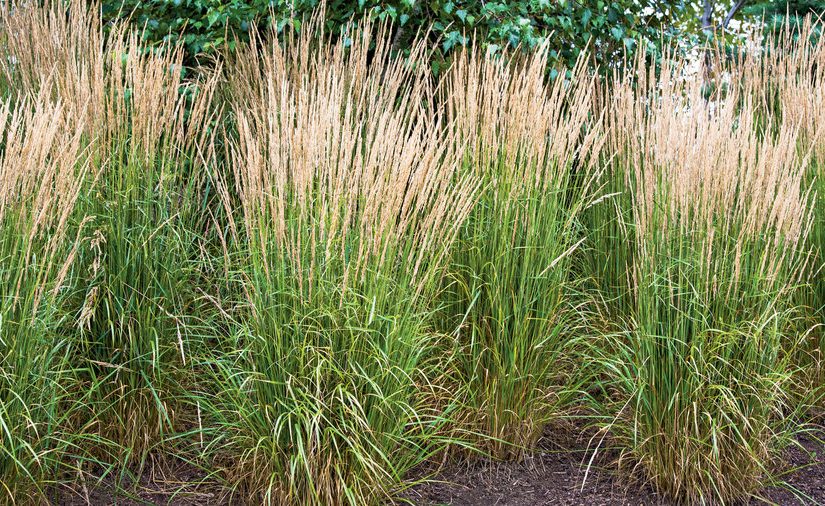
Calamagrostis acutiflora ‘Karl Foerster’ Feather Reed Grass

‘Karl Forster’ is a striking, formal upright grass that turns golden as the season progresses. Like the Mexican Feather grass, it has that lovely motion in the breeze that can be so delightful in the garden. It has a distinct sound from other grasses when the seed stalks rattle together. Feather Reed Grass has been on the “It’s It” plant lists for a few years for good reason. As a natural hybrid of of C. arundinacea, and C. epigejos it can claim heritage to both natives of Asia and Europe. The seeded heads are sterile so there is little chance of unleashing another invasive grass in to the landscape.

On the Central Coast, this Calamagrostis is only semi-deciduous and can remain green through most of the year if it gets some dry season water. A little late fall – early winter trim of old growth can get it off to a good fresh start for the spring. As a grass, it does like a bit of fertilizer during the growing season. It will tolerate both clay and sandy soils, and, can become drought tolerant after establishing. Just an FYI – this grass will get up to 5 feet tall when it blooms unlike the Mexican Feather Grass!

Pink Muhly drought tolerant grass selection
Pink Muhly adds a burst of cloud pink to the garden when the seed stalks form

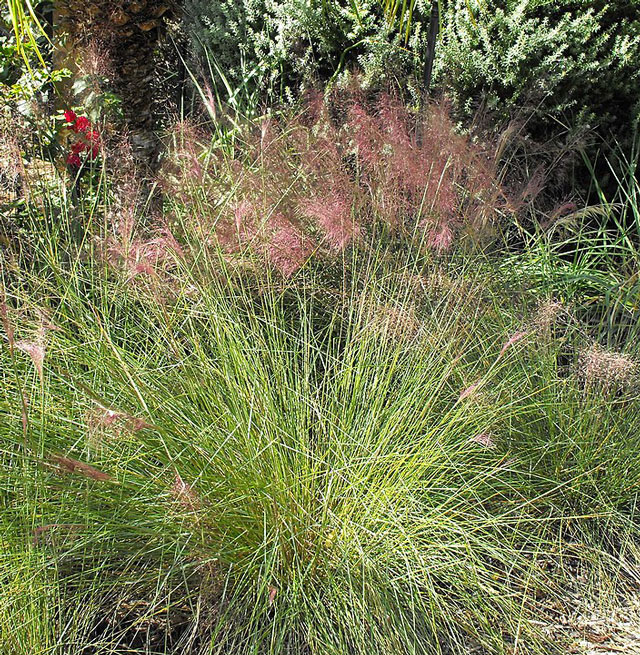
Muhlenbergia capilaris ‘Pink Muhly’

The ornamental value of this ‘Pink Muhly’ cannot be understated. It is a showstopper when in full pink cloud bloom. This grass has been featured in many garden spreads and does not disappoint. The pink heads fade to a tawny brown through the season at about 3 feet high. There is also a white cultivar – ‘White Cloud.’

This grass is semi-deciduous and can be given a haircut in the early winter unless the winter grayed color is desired. Pink Muhly requires good drainage so not a choice for heavier clay soils. As for drought tolerance, in the sandy soils a little summer water can go a long way to extend the show.

Drought tolerant tough Muhlenbergia rigens
Muhlenbergia rigens has great texture when planted in clumps

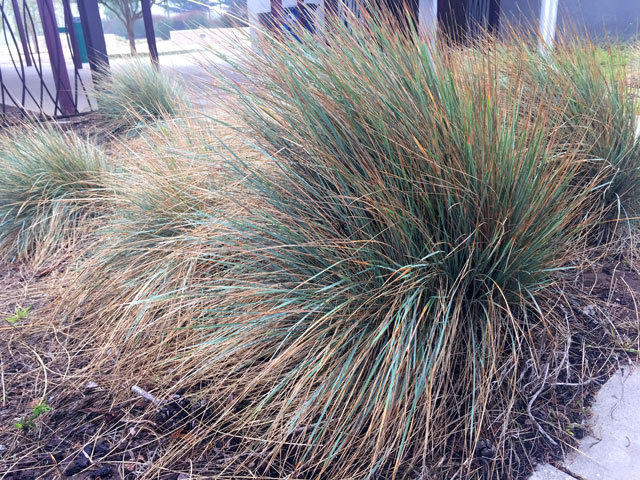
Muhlenbergia rigens Deer Grass

Deer Grass is a California Native (but not to all areas of California). That said it is extremely adaptive to most soils and conditions and can even take a bit of shade. It can easily grow under oak trees in dappled shade. This is a tough plant that can grow to 4 feet tall. The roots grow very deep and give this grass a great toe hold for drought conditions after establishment. A battery of Deer Grass can stabilize a soil bank equal to any large shrub! As another bonus, this grass feeds many birds and beneficial insects. Deer Grass deserves to be in more California-style gardens for its fountain like structure and shaggy evergreen form.

Still looking for something else?

Using native California grasses in the landscape can offer a unique fit to specific soils and growing conditions. There are many other native California grasses that have a place in the garden.

Here is a partial list that is worth a little research:

  • Bouteloua gracillis
  • Festuca californica
  • Festuca idahoensis
  • Carex – several species
  • Deschampsia caepitosa
  • Leymus triticoides
  • Nasella pulchra

Save

Save

Save

Save

Bees Wax Wraps

There has been a lot of attention on ways to reduce plastic use everywhere; including in the home. Storing food in plastic seems like a great place to rethink plastic use. Beeswax wrap covers are getting a lot of promotion as a solution to food storage and I decided it was time to give them a try.

This is a natural exploration/solution as;

  1. We have lots of beeswax
  2. Clothing is one of the biggest waste streams in the US
  3. How hard is it to cut up some fabric and add bees wax?

So off to the Goodwill to select some appealing all-cotton textiles that could be cut down in various sizes for the wraps. The men’s section offered the best selection for XL sizes (more cloth), all cotton, and no “Pink Tax”. If you are not familiar with the term, generally any women’s clothing will automatically be more expensive than a similar item in the men’s department. Sadly, it is no different at the Goodwill.

Pillow cases for wax wrap
Pillow cases freshly washed and ready for cutting

All cotton pillow cases proved to be another good source for lots of fabric for a few dollars, and, there were some prints that worked well with the checkered shirt. All in all – 2 pillow cases for $3.99 and one shirt for $4.99 – about $9 for several yards of all cotton fabric. Not bad given that most all-cotton fabric with interesting prints is about $8.99 a yard at a minimum these days.

The next step was deciding what sizes would be most useful as wraps and to plan out the maximum number of wraps from the short sleeved shirt and the pillowcases. I ended up with about 15 wraps of various sizes and proportions. Although a large wrap would have been nice for a loaf of bread – the oven sheet pans turned out to be the final limit on maximum wrap size.

Bees wax wraps
Pinking shears are best for cutting a no-fray edge

An aggressive internet search for an exact recipe for the wax wraps proved to be frustrating. The basic concept is that grated bees wax and an oil are added together and melted in the oven at the lowest temperature. Bees wax is flammable and an over hot oven could be a disaster so keep it cool.

The instructions I followed were way too oily and the wraps did not stick to vessels very well. No problem – the fabric wraps were reheated with more wax to make a better consistency. Further research showed that some recipes added pine pitch to the mix to make a crisper seal, but no specific ratios were found online. This is an experiment I mean to revisit soon adding pitch to the mix.

One recipe said to use a cheese grater to grate the beeswax if using a non-pelleted wax. Well, this was way too much labor and overworked the old hands. A double boiler was used to melt big chunks of wax and to mix with the coconut oil.

Wax Wraps steps
Pre-melting the wax proved to be more efficient than grating

Using a utility paint brush, the melted wax/oil wax was smoothed across the fabric on a cookie sheet lined with a paper baking sheet. It was not necessary to cover every edge of the fabric as the heat of the oven melted and saturated the wax/oil quite thoroughly. The fabric was stacked in several layers with wax applied to each wrap.

Hot wax wrap
Stacked wax wraps before heating in the oven on a low setting. Note brush marks and lumpy drips in top right of the photo.

When the saturation looked good in the oven each wrap was lifted out to separate and then hung on the line to cool. The wraps cool fairly quickly just from taking out of the oven. If there were any lumps from cooling too quickly, they got another turn in the oven.

Wax Wraps
Waxed wraps cooling on the line. The pocket from the shirt proved fun when wrapping a sandwich to stuff extra treats in.

So, overall this was a good project but the recipe I used needs more work and is not good enough to endorse and pass on. The consistency of the wax/oil would not stick to itself or a vessel and left a residue on steel and glass. We ended up using a produce rubber band or string to hold shut for traveling sandwiches. This wrap was a great solution for cheese as it kept it from drying out and the antibiotic nature of the wax seemed to minimize mold formation (except on wet mozzarella). A warm rinse after use kept the wraps clean enough for our needs.

A next generation experiment will incorporate the pitch and use a food grade walnut oil (it does not go rancid). Perhaps a solid proven recipe will be posted to the website soon.

Save

Save

Save

Save

Save

Save

Save

Save

Save

Save

Save

Save

Save

Beach Garden Part 3

Planting a Pollinator Mound

After the second year of the garden, the old wooden raised beds were falling apart and the owner wanted a perennial solution that would be attractive year round and feed pollinators. Although having a spot to plant food had been originally desired, the upkeep was not in alignment with an increasingly busy schedule.

Paved patio area
Raised wooden beds on the left were useful for a few more seasons, but it was time to swap with something more attractive.

The sidewalk along the house was very narrow and the owner had leftover brick added to widen the path against the house. This left a central area of soil about 14 feet long and 4 feet wide that could be planted with low care perennials.

Prepared mound of soil for planting
Soil moved from the added brick path strip (visible to the right) was used to build a mound prepped with lots of added compost and aged manure.

The plants needed to be perennials with low water and maintenance needs and offer lots of nectar and pollen in long overlapping seasons. The colors needed to be harmonious and blend with the other plantings already growing in the garden. Although the rest of the garden has many native California plants we decided that this spot could be a looser mix of perennials to feed a broader list of pollinators.

Raised mound for pollinator garden
The mound had a few weeks to “age” in all the added amendments before planting began

The pollinator plant list was refined down to:

  • Achillea filipendulina – ‘Gold Plate’ Yarrow
  • Erigeron karvinskianus – Santa Barbara daisy
  • Festuca glauca – Elijah Blue Fescue
  • Lavendula augustifolia ‘Hidcote’
  • Penstemon ‘Garnet’
  • Rosa mutabilis – Butterfly Rose
  • Salvia ‘Wendy’s Wish’
  • Salvia ‘Waverly’
  • Senecio cinneraria – Dusty Miller
  • Stachys byzantina – Lamb’s Ears
  • Packet of California native wildflowers seeds sprinkled across the mound

Oak barrel ready for planting
Half oak barrel was added for a small spot to plant edibles in February

The yarrow, dusty miller and Santa Barbara daisy are attractive to butterflies and syrphid flies, while the tube flowers like the penstemon and salvias attract hummers and night moths. The small lavender and butterfly rose feed native and domesticated bees. The fescue is not a pollinator plant, but there needed to be some repeating  texture and blue color to tie in the other areas of the garden. All were planted in the fall well before the winter solstice and have had ample water from the generous rain this year (2018-19). The fall is the best time to plant a perennial garden on the Central Coast. Ditto for broadcasting native wildflowers before the rains start.

Planted mound begins to fill in
By March the wild flower seeds have filled in between the perennials

Pollinator mound
A few more weeks in to April but the wildflowers have not yet begun to bloom

The final plant for the mound was to be a Rosa chinensis ‘mutabilis’ but it proved to be elusive in the local and bay area nurseries. Multiple calls to various nurseries beginning in October could not source the plant in the pot. Annie’s Annuals on-line had listed but not available for ship. I took cuttings in April having lost faith with the nurseries. This is a common problem in the trade. Trends change and beautiful plants become unavailable because no one is growing for this season. This is where a little skill with propagation can provide plants that might be a hard to locate if there is parent stock available.

If you are not familiar with it, the butterfly rose is a very hardy and delightfully colored rose that begins as a yellow bud, opens to pink and deepens to rose red before the petals fall off. It is one of the EarthKind® Texas A&M. This coloration will play off of the yellow yarrow, the magentas in the penstemon and ‘Wendy’s Wish’ salvia. Blue purple ‘Waverly’ salvia and deep blue ‘Hidcote’ lavender will contrast with the yellows and support the magenta colors. The plants with silver/gray foliage add interest when not blooming. So far, the ‘Wendy’s Wish’ has been reliably blooming since we planted it, but still waiting on the spring show for the rest of the mound.

Save

Save

Save

Save

Save

Save

Save

Save

Save

Beach Garden Part 2

Spring comes and changes everything in the garden!

This garden really began to evolve after the good winter rains of 2017-18. In the first year most of the large shrub and tree plantings were installed in the fall and winter. This gave all of the plantings the benefit of good root growth before the spring. We also threw down some wildflower seeds that got entirely out of control—in a good way.

The rock path was laid down mid spring/early summer. It connected the patio to the house and gave the garden a non linear flow. During the sheet mulching phase, we discovered lots of pavers buried around the yard from a previous owners use. This was a significant bonus as there was a LOT of stone material that would have been costly to purchase and much work to move on site. This path was built over several weeks an afternoon at a time using the found pavers.

Paver garden pathway
After tamping the sand to make a solid base, the meditative piecework began

Paver path in progress
Numerous California Poppies and Red Ribbons from the wildflower seed packet needed to be pulled up to lay down the pavers. A few plants remain on the edges to reseed for the next year.

The photo below shows how fast the Catalina Ironwoods grew in one year and  blocked the neighboring wall as desired. Understory plantings included the native Huecheras, Sticky Monkey and blue fescues. We did not gopher basket the grasses and the gophers ate ALL of them over the summer. Lesson learnedput everything gophers find tasty in baskets.

Catalina Ironwoods
The Catalina Ironwoods exceeded all expectations for growth, hardiness and beauty

Sticky Monkey flower
Native Sticky Monkey flower can take partial shade conditions and paired well with the Ironwoods, Heucheras and Blue fescue

The path firmly connected the house to the patio and invited exploration. The backbone shrubs such as the Italian buck thorns along the windy edge were filling in and were topped to keep to fence height and promote more side growth. An Italian buck thorn can grow over a foot a year and will top out at about 20 feet if left un-pruned. They are very drought tolerant once established and make an excellent dense privacy screen.

Paved patio area
Most of the larger features were completed within the first year. The straw bale garden boxes served for the first year but were removed eventually to create a pollinator garden

On the dry side yard, by the street access gate (where the small apple tree had been originally) we planted a California Flannel bush (Fremontodendron californicum). It will grow to 25′ if not trimmed and will make a lovely yellow flowering focal point viewed from the patio that requires no summer water. A note of caution: this shrub has fuzzy irritating hairs (hence the “flannel bush” name) and pruning without eye and skin protection is not advised. The flannel bush is best planted away from points of close contact and should be given plenty of room! In the photo below, the flannel bush has already doubled in size from the original 5 gallon pot.

side yard with fremontodendron
View of the side yard with Italian buck thorn hedge (along fence), Fremontodendron, California buckwheat, blue fescue and poppies

Gardens are always evolving. The sweet spot is to accept and enjoy the changes that develop over time knowing that there will be MANY singular moments when the garden is “perfect”. Yes, the gophers ate the blue fescue, but they were replanted the next fall with economical 6-pacs using wire baskets. The gophers come for the California poppies, but there are many to share

Up next: the Pollinator garden mound


Save

Save

Save

Save

Save

Save

Save

Save

Beach Garden Part 1

Sometimes a slowly developing garden project can be very satisfying – even when it is spread out over several seasons.

Davis yard "Before"
This yard had a lawn at one point in time but little else of interest to call it a garden

Year One

Margaret’s garden began with a desire to create outdoor space for entertaining and play area for a new grandchild with the blank slate of her yard. There had been an era of lawn—long dead—with only the bones of the sprinkler system and the trashy green turf netting peeking out of the weedy sandy soil. A strata of redwood bark and some rotting wooden garden beds indicated another era of discarded use. There was a single healthy Santa Rosa plum, an unknown apple, a monster rosemary bush and some climate inappropriate grapevines. But overall, the lot was devoid of structure or plantings and we could dream a new garden with little impediment.

Davis yard "Before"
The neighbor’s garage and free standing fireplace dominated the space and necessitated a screening solution

We worked up a list of desired outcomes for the new garden. They included privacy, wind screening, herb area and vegetable bed, a patio seating area, low maintenance and drought tolerant pollinator and native plantings, and, view screening of the neighbor’s two story monolithic garage wall and free standing chimney that dominated the yard.

Make a use plan of the site
Even a rough sketch of features and use of space will help make decisions on the larger elements such as a patio and walkway

The first order of business was replacing the decaying old fence. Because there was a need to move a large shed on site, the new fence included access to the side street with a large sliding gate. This greatly simplified bringing in wood chips and bricks for later portions of the installation.

Preping for the brick patio
New fence with rolling gate access, freshly planted buck thorn hedge and future brick patio area. Note little apple tree top right.

After a few months when the fence was finally secure, sheet mulching began for the entire sandy lot. If you are not familiar with sheet mulching to remove lawn, control weeds and improve soils, visit this link here. Cardboard was laid down onto the moistened sandy soil. The cardboard was then wetted down and covered with a very thick layer of free wood chips dropped off by a local tree service. That side gate came in handy yet again! The backbone Italian buck thorn hedges were planted during the sheet mulch phase around the perimeter of the fence to eventually soften the line of the fence, provide further screening and slow the prevailing wind.

Consideration was given to watering zones and it was decided that the side yard would have native plants that would be eventually left to their own with no dry season water. So the little apple tree had to be moved around to the other side of the house to an area where watering would occur. In this case next to the existing happy plum tree and compost area. The tree was moved in late January during its dormancy (as much dormancy as you can get on the central coast anyway). Pre-treatment included deep watering and cutting around the root ball with a shovel following the drip line of the tree. This gives the roots a few weeks to grow new roots closer to the tree before excavating. The root ball was carefully dug out and wrapped with a ground cloth to drag it around to the new location. Lots of good Black Forest compost soil amendment was added to the soil when replanting and finished off with another deep watering. Not only did the tree recover admirably that spring but produced a nice handful of apples as thanks in the fall.

Apple Tree
The apple tree made the move while still dormant in January. Newly planted Catalina Ironwoods visible top right

Apple tree replanted
Apple tree successfully in place next to the plum tree and composting area

To create a softer view from the house, three native California Channel Islands Catalina Ironwoods (lyonothamnus floribundus) were planted in a mound. Their beautiful shaggy bark and ferny foliage will be a much improved view shed over the great expanse of painted 2-story wall!

Catalina Ironwood
Catalina Ironwood saplings will grow quickly to block the neighbors monolithic wall and need little care over time

For convenience to the kitchen, the herb mound was built with extra soil moved from the patio installation and plenty of additional compost. Herbs such as thyme, oregano, marjoram and chives were planted in the mound. Succulents and Santa Barbara daisies were added around the edges along with daffodil bulbs for seasonal color. A Meyer lemon now lives in a pot and will eventually be planted into the mound. This was a way of testing if the lemon liked this location without committing entirely.

Planting the herb mound
Outline of new herb mound accessible from the kitchen with new lemon tree just after the sheet mulching was finished

The patio area was a whirlwind one weekend work party effort by the owner’s family. With lots of hands, bricks and a good bit of know how from Margaret’s brother this DIY project turned out solid. They now have a place to gather outside with a free standing fire pit, seating and a barbecue. They can congratulate themselves on family bonding and a good job accomplished.

Completed Brick Patio
New brick patio started with materials sourced on Craig’s list and was installed as a family project

Herb mound with lemon tree
A few months after planting the herb mound—the feverfew took over the mound that summer

The 3 wooden beds from the previous tenant were re-purposed for another year. We moved them next to the house and filled with rotting straw bales (visible top right in image above). That summer had some fantastic tomatoes that sprawled beyond the beds and provided tomatoes into November. A year later, this feature was replaced by a more formal landscaped mound (see next post).

Save

Save

Save

Save

Save

Save

Save

Save

Save

Save

Save

Save

Save

Save

Save

Save

Save

Save

Save

Save

Save

Save

Save

Pineapple Guavas

Right around December the pineapple guavas begin to drop and give off their delightful perfume. This is an odd fruit; silver green and shaped like a hens egg with a fragrance out of kilter with its looks. The smell promises so much sweetness.

The proper name is Feijoa sellowiana and it is a popular landscaping plant even without the added bonus of fruit. This shrub has evergreen leathery leaves with a silvery underside. The blossoms are pinkish with bright red stamens that draw in the hummingbirds. That show alone should put this plant on the top of the list for a spot in the garden. It is also drought tolerant in the sand which makes it a double AA plus plant in my book. One word of caution; if you are growing specifically for fruit, it must be watered to develop the fruit. Otherwise it will be a nice looking flowering shrub with no fruit.

Guava Flower
Luscious red stamens of the Feijoa sellowiana flowers add so much to the garden

At a fruit tasting I discovered that the seed grown guavas have quite a bit of variability in form and taste, so it is worth getting a known clone with the desired flavor. Some varieties have much rounder, yellower sweeter flesh, and some have a longer form with a tart thicker skin (‘Nazemetz’ shown below).  Generally, the best way to enjoy is to scoop the pulp from the skin and eat fresh.

Pineapple Guava
Pineapple guavas (‘Nazemetz’ variety shown here) can be very, very productive!

The guavas just begin to drop off the shrub when ripe and can ripen further on the counter. The smell is intoxicating. Because pineapple guavas are so very abundant (and one feels so very averse to leave out for the possums), it must be figured out how to insert into the food plan! A quick internet search shows many smoothie, jam, chutney, fruit leather and fruit bread recipes using pineapple guavas, but not so much in the savory arena. Ginger and cloves are a great pairing with the flavor of pineapple guavas and can work for sweet or savory. Roasted chicken with a guava chutney is most memorable. I just spread a pint of chutney made last year over a halved fryer and roasted uncovered in a glass baking dish. Served the roasted chicken with Basmati rice and spooned the roasted sauce over all.

The F. sellowiana can be a wide shrub (4′ wide x 6′ tall) or trained as a small tree (15″ + tall). I found this link to UC Master Gardener Program of Sonoma County that mentions shaping the guava into an espallier to save space. There is a photo of a much yellower variety (unfortunately not named) but the image indicates the enormous variability of the fruit between cultivars.


Save

Save

Save

Save

Save

Save

Save

Save

Save

Save

Eat Your Pumpkins

Let’s get the confession out of the way first—I did not grow this pumpkin.

Here is the story; for years I have grown a few pumpkins in the backyard. They have never been abundant nor large due to various cultural constraints (space, for one). But, after a period of display for Halloween and autumn color they all get eaten. Years that I did not have a particularly large crop, my neighbor who grows wonderful pumpkins up the street has passed a few Cinderella pumpkins my way. Before the ground squirrels became such a problem at a local community garden, pumpkins were traded there as well.

This year disaster struck. I did not grow pumpkins. My neighbor did not grow pumpkins. The ground squirrels ate every pumpkin, gourd, squash and any other delicious growing thing in the community garden. It was after Halloween and all the pumpkins had been removed from the stores. What ensued was an epic pumpkin hunt all because I refused to use canned pumpkin for the annual Thanksgiving pies.

Although I finally tracked down the heirloom pumpkin featured in the image above, why would these nutritious and long storing fruits be discarded from the grocery stores so hastily? Butternut, banana and acorn squash are available all through the winter, but pumpkins have been relegated to ornamental value only. It is time to rethink this “tasteless” trend.

It is relatively easy to cut up, remove seeds and boil up a pumpkin. I don’t bother to take the rind off before hand because it is easier to scoop the flesh from the rind with a big spoon (throw seeds and rind into the compost). I then put all of the pulp in to a stainless steel mesh strainer and allow the pumpkin to drain for a bit. Then just squeeze out the liquid a bit more by pressing down on the pulp. The resulting liquid is useful for watering outdoor plants because of the nutrients—so don’t throw down the sink!

Pumpkin Pie
The fresh pumpkin pie will have a better texture and brighter color than when using canned pumpkin

After making a few pies, I freeze the remaining pumpkin to use for soups, breads and more pies. I freeze in measured batches based on how I might use in the future. The freezing process releases more of the liquid from the cells when defrosting; an added bonus for a relatively dry pumpkin pulp.

Pumpkin Potato Soup
A delicious pumpkin and potato soup using Thanksgiving turkey stock

Ironically, after all the footwork spent on locating a pumpkin for Thanksgiving pies, someone dropped off a wealth of pumpkins and gourds at the community garden compost pile the very day after! It was an unexpected wealth of color and form. Mind you, they were perfectly good to eat, but no longer required in their ornamental capacity. I think it is possible find a better use for them. Pumpkin curry anyone?

Ornamental pumpkins
Some of the rescued ornamental pumpkins dumped on the compost pile the day after Thanksgiving! All edible varieties.

Save

Save

Save

Save

Save

Save

Save

Save

Save

Save

Save

Save

Save

Thinning the apples

In the early part of the season when luscious apple blossoms abound, it is easy to hope that every flower will produce stunning fruit. But this is not exactly the case. If you want large uniform fruit, you must thin out that abundance so that the tree does not get taxed in producing all those seeds.

Apples generally have spurs where the flowering/fruiting occurs. If a spur has 5 or more stems swelling to fruit – thinning out to two or three fruits will produce a larger fruit without costing the tree a lot more energy.

Thinning apples
Thinning apples early in the season will produce larger fruit. This should have been done a bit earlier than shown here when the fruit was smaller than a marble.

A light touch is good here to separate the stems from the spur. Breaking off the spur entirely means no fruit this year or the next, so be gentle. There should be two to three stems with developing fruit left attached after thinning. Use judgement with the apple variety and final size potential for the apple. An over weighted tree then risks breaking branches trying to carry the load of fruit to harvest.

Thinning apples
This looks like a loss of a lot of potential apples but the tree will reward you later

Generally, the culls go in the compost to complete the waste into nutrient cycle. Don’t leave them to rot under the tree where they might attract insects like light brown apple moths or coddling moths. (or rats and slugs, etc…)

Thinning apples
Apples have been thinned down to 2-3 fruits per spur

After thinning, the tree should begin to respond with growth on the remaining apples. One year, I did not thin and the apple tree produced MANY tiny misshapen apples. They were delicious, but the following year the tree had to take a rest and there were only a few apples produced. Taking the time to thin allows the tree to be productive without an excessive drag on nutrient requirements from year to year.

Thinning apples
A month after thinning and the apples have grown to a larger uniform size

A small backyard apple tree is a joy and generally requires little maintenance beyond watering, seasonal additions of compost and light pruning. The apple shown above is a coastal apple – Cinnamon Spice – discovered in Bolinas as a wild sport. It has low chill requirements, takes coast conditions and produces a very crisp sweet apple. It is very productive and the apples ripen into color like ornaments. Trees of Antiquity carries this apple and can be ordered as bare root.


Save

Save

Recycled Wood Raspberry beds

This was a short and sweet gardening project that used some nice recycled ship lap redwood and 1 inch thick boards. The redwood came from an acquaintance that was moving and had to release his collections of scavenged wood bits. This was a perfect project that solved the problem of gophers, and, increased the food area in a non-productive strip of sandy soil that nothing favored growing in.

Old plants were removed from the site
First all of the straggler planting was removed from the sandy strip

By creating two raised beds the raspberries could be planted in good house compost fortified soil. Watering needs would be less and the raspberries could be curtailed from spreading into other areas of the garden. There was a concrete footing along one edge that was a remnant from a previous dweller on the property that would also help contain the berries in this narrow strip.

Assembling the raised bed
Assembling the raised bed using the recycled lumber was easy and the ship lap made a nice tight fit for keeping soil inside the boxes

Most of the lumber was already cut to a 4 foot size. Only a little bit of cutting was required to assemble two raspberry beds. These beds are approximately 3′ x 4′ in size and 2′ deep. The screws and galvanized wire were the only costs to this project (besides labor and visioning).

Gopher wirte was added to the bottom of the raised beds
Galvanized wire bottom was an absolute necessity because of the ravenous gophers that historically lurk in the neighborhood

The raspberry starts were Heritage variety, which is a fall bearing type that will give a small crop in the spring with heavier fruiting in fall. This is a perfect growing habit for the local climate as the raspberries don’t get fried by summer heat (not in the summer fog!) but get that nice clear skies push in September, October and November.

Raspberry starts are added to the compost filled raised beds
The raised beds were filled with house blend home compost and the raspberry starts were planted and watered very thoroughly

Some of the plants were dug up from another garden where they were escaping the bed. All of the planting was done in late February when plants were still a bit dormant – although not as dormant as, say, Montana!

Recycled wood raised raspberry garden bed
The second raspberry garden bed is added to the strip and planted with the new starts bought at Bokay Nursery

Of course, there were some volunteers from the home compost that appeared shortly after planting. One tomato was allowed to fill a corner of a bed and so tomatoes were harvested from the bed in the first year as well. Now the bed is so filled with raspberry canes that there is no root room for much else to get started.

The raspberries are beginning to travel outside of the bed but the maintenance of removing runners has been minimal. These beds are hand watered, but thinking that some drip automation would free up my time and probably give a better crop. I do top dress seasonally with straw, manure or more compost depending on availability.

Raised Raspberry bed
A volunteer tomato provided a nice extra crop while the bed filled in with raspberries

Overall, the raspberries were a good addition to the garden. Other than watering, not too much else is required. The gophers have not been able to get in, and, the birds would rather eat the blueberries. There has been a minimal bit of leaf roller caterpillar damage seasonally. This coincides with nesting season and we have observed birds investigating the undersides of every leaf to find treats for fledglings. So maybe the bird foraging is controlling a possible larger outbreak here

Save

Save

Save

Bees in the Garden

This spring was lovely and there were a few good swarms that I was able to video in action. Below is what may have been a mating and supercedure. The bees flew out of the hive, swirled about for a few minutes, then headed back into the hive. No flying over the fence or climbing trees required.

https://www.facebook.com/100014879046746/videos/376223959550236/